How to Stain a Log Cabin: Top Tips for 2024 Success
The Importance of Staining Your Log Cabin
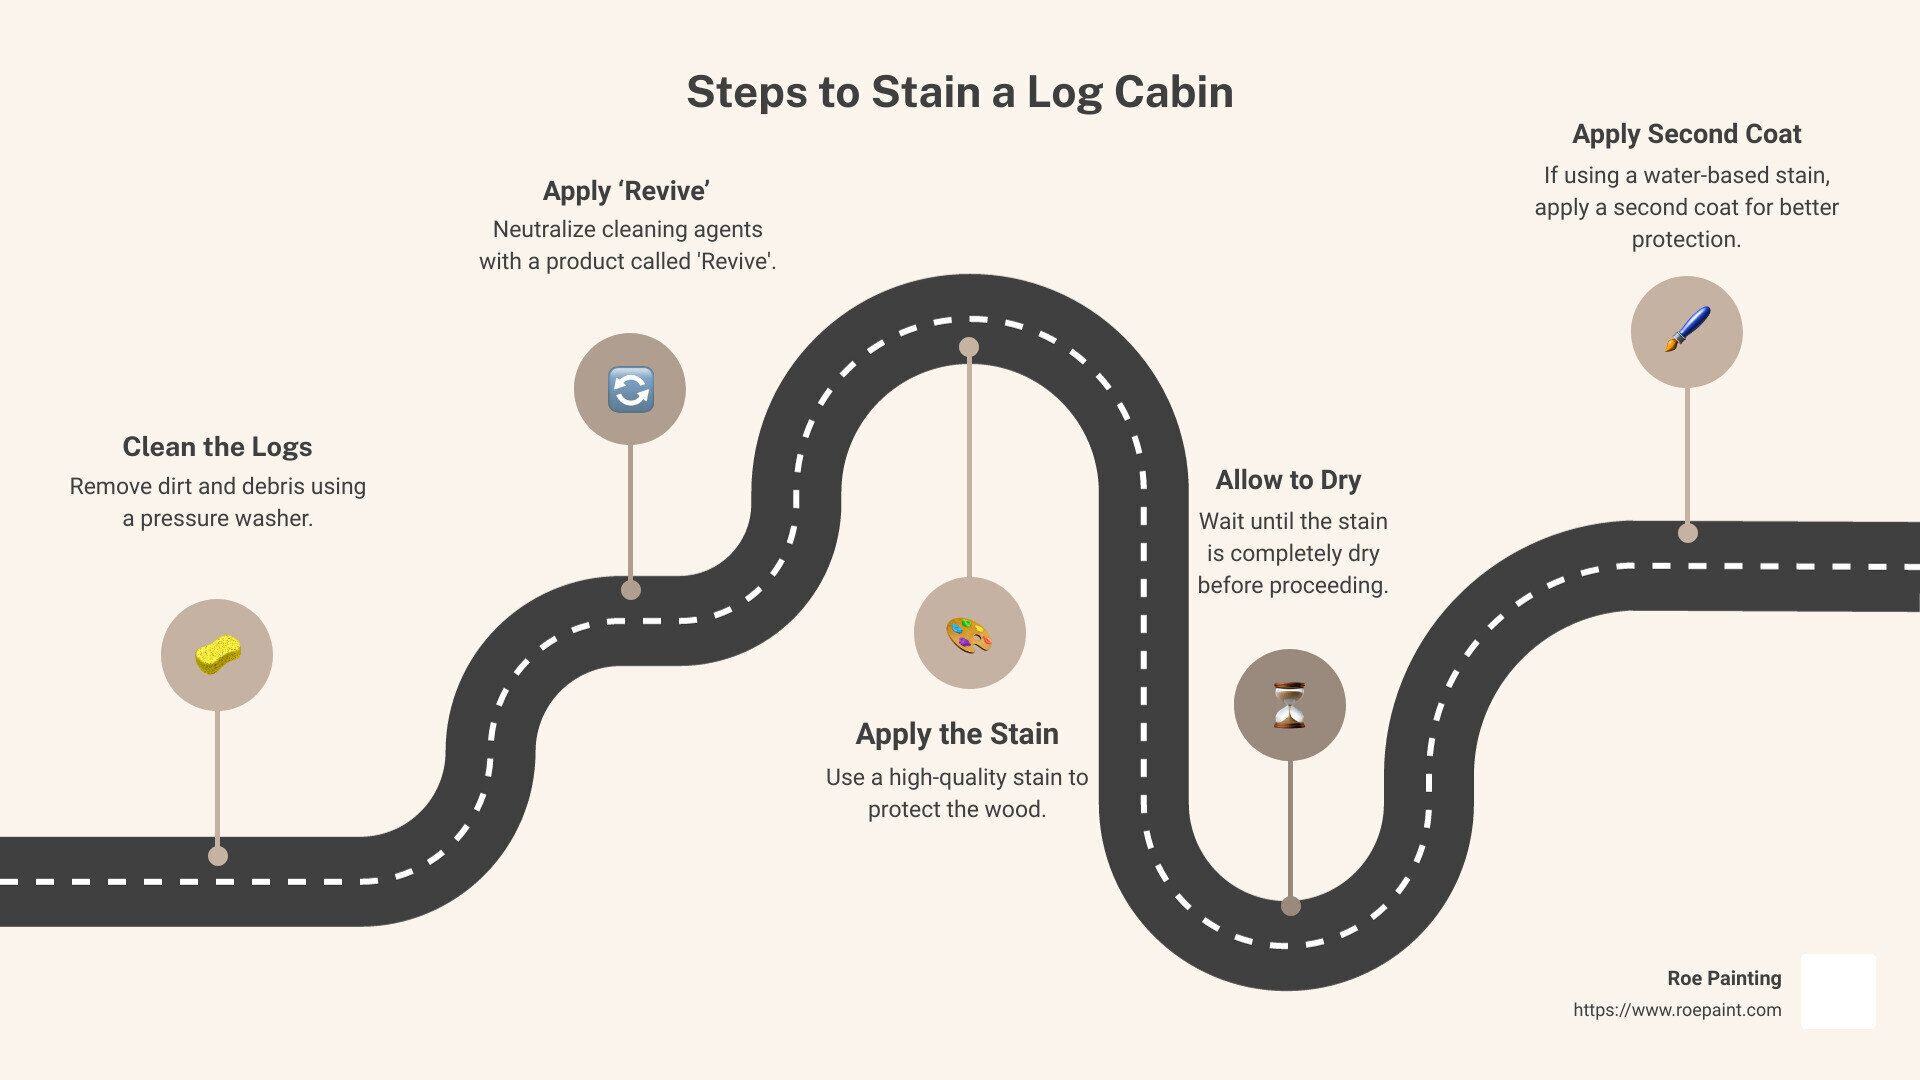
How to stain a log cabin is a key question for homeowners who want to keep their log homes looking beautiful and well-protected. Staining your log home is not just about aesthetics; it is critical for maintaining the wood and extending its lifespan. Before diving into the detailed steps, here are the basic actions you need to undertake:
- Clean the Logs and Other Wood Surfaces: Remove dirt and debris.
- Apply a Product Called “Revive”: Neutralize cleaning agents.
- Apply the Stain: Use a high-quality stain.
- Allow the Stain to Dry: Wait until the first coat is completely dry.
- Apply a Second Coat: If using water-based stain, a second coat may be needed.
Staining your log cabin protects it from threats like sunlight, moisture, and dirt buildup. Without proper care, exposure to these elements can lead to serious damage such as wood decay, cracking, and insect infestations. A well-stained log cabin isn’t just more durable—it’s more visually appealing, too.
Hi there, I’m Andy Roe, CEO of Roe Painting. With over two decades of experience in painting and log cabin restoration, I’ve seen how staining a log cabin correctly can transform and protect your home.

Preparing Your Log Cabin for Staining
Before diving into the staining process, proper preparation is key. Let’s break down the essential steps to ensure your log cabin is ready for its new coat of stain.
Cleaning the Logs
Start by cleaning the logs thoroughly. Dirt, dust, and debris can prevent the stain from adhering properly. We recommend using a pressure washer with a minimum of 3000 psi to remove these contaminants effectively.
Tip: Use a mild house cleaner and a soft bristle brush to scrub the logs gently. This helps in removing mold, mildew, algae, and pollen without damaging the wood.
Important: Avoid using high-pressure settings, as this can damage the soft grain of the wood, raising the hairs and creating an inconsistent surface.
Removing Mill Glaze
New logs often have a hard layer known as mill glaze. This needs to be removed for the stain to adhere properly. Use an orbital finish sander to sand down the logs. This step is crucial for achieving a uniform, clean surface.
Safety Tip: Wear a mask during this process to avoid inhaling harmful particles. Any basic mask that covers your nose and mouth will do.
After sanding, rinse the logs to clear away any leftover sanding particles.
Masking Off Areas
Before you start staining, make sure to mask off areas you don’t want to stain. Use tape and plastic covers to protect windows, doors, and any other areas that should remain stain-free.
Pro Tip: Masking off areas not only protects them from stain but also helps in achieving a clean, professional finish.
By following these steps, your log cabin will be perfectly prepped for staining, ensuring a beautiful and long-lasting finish.

Choosing the Right Stain
Choosing the right stain for your log cabin is crucial for both appearance and protection. The two main types of stains are oil-based and water-based. Each has its own advantages and considerations.
Oil-Based Stains
Oil-based stains are the go-to choice for many log cabin owners. They penetrate deeply into the wood, providing long-lasting protection. Here’s why they might be the best option for you:
- Durability: Oil-based stains are known for their long-lasting durability. They stand up well to the elements.
- Deep Penetration: These stains soak deeply into the wood, offering better protection against moisture and UV damage.
- Moisture Repellency: Oil-based stains are excellent at repelling moisture, which helps prevent wood rot and decay.
- Slow Drying Time: While this might seem like a downside, the slower drying time allows for a more even finish.
However, oil-based stains do have some drawbacks. They can be messier to work with and require solvents for cleanup. Plus, they are not as environmentally friendly as water-based options.
Water-Based Stains
Water-based stains are another popular choice, especially for those looking for a quicker and cleaner application process. Here are some key points:
- Fast Drying: Water-based stains dry much faster than oil-based ones. This can be a huge time-saver.
- Surface Penetration: While they don’t penetrate as deeply as oil-based stains, they still offer good protection.
- Application Difficulty: Because they dry quickly, it can be challenging to apply them evenly over large surfaces. You might need to work in smaller sections.
- Environmental Conditions: Water-based stains are more sensitive to environmental conditions. Avoid applying them in very hot, cold, or humid weather.
Despite these challenges, water-based stains are easier to clean up and are more environmentally friendly.
UV Protection and Pigment Levels
Both types of stains offer UV protection and come in various pigment levels. The right amount of pigment is crucial for protecting your logs from sun damage. Too little pigment won’t provide enough protection, while too much can hide the natural beauty of the wood.
Moisture Repellency
Both oil-based and water-based stains offer moisture repellency, but oil-based stains are generally better at keeping moisture out. This is important for preventing issues like wood rot and mold.
In summary, the choice between oil-based and water-based stains depends on your specific needs and conditions. Oil-based stains offer durability and deep penetration, while water-based stains provide faster drying times and easier cleanup. Consider your environment, the condition of your logs, and your personal preferences when making your decision.
Next, we’ll dive into how to apply the stain for the best results.
Applying the Stain
Initial Coat Application
Before you start, ensure you’re in a well-ventilated area. This helps avoid inhaling harmful fumes.
Step 1: Spray Application
Using a sprayer can save time, but it’s crucial to follow up with back brushing. The sprayer applies the stain evenly, but brushing ensures it penetrates the wood.
Step 2: Back Brushing
Immediately after spraying, have a second person use a brush to work the stain into the wood. This creates a uniform finish and helps the stain adhere better.
Temperature Conditions
Ideal temperatures for staining range between 50-70 degrees Fahrenheit. Avoid working in direct sunlight or high humidity. These conditions can cause the stain to dry too quickly or too slowly, affecting the finish.
Drying Time
Allow the initial coat to dry for at least 24 hours. This ensures the stain has fully penetrated and set into the wood.
Chinking and Caulking
Step 1: Caulking Checks and Cracks
Once the first coat is dry, it’s time to address any checks or cracks. Use caulk to seal these areas, focusing especially on the tops of logs where water can easily enter.
Step 2: Adhesive Properties
Caulk acts as an adhesive and seals the logs effectively. Applying it after the first coat makes it easier to clean up any excess, as the stain will have already sealed the wood.
Finishing Coats
Step 1: Multiple Coats
Most stains require at least two coats. Some might even need three. Always check the manufacturer’s instructions.
Step 2: Drying Period
Wait at least 24 hours between coats. This allows each layer to set properly, ensuring maximum protection and a uniform look.
Step 3: Clear Coat
If your stain system includes a clear coat, apply it after the final stain layer has dried. This clear coat adds an extra layer of protection and enhances the wood’s appearance.
By following these steps, you’ll ensure your log cabin is not only beautiful but also well-protected against the elements.
Next, let’s tackle some frequently asked questions to clear up any remaining doubts you might have.
Frequently Asked Questions about Staining a Log Cabin
What is the best temperature for staining a log cabin?
The ideal temperature for staining your log cabin is between 50 and 70 degrees Fahrenheit. This range allows the stain to penetrate the wood effectively and dry uniformly.
Low humidity is also crucial. High humidity can prolong drying times and affect the stain’s absorption.
No rain for at least three days is essential. Although most stains can withstand mild rain after 24 hours, it’s best to play it safe. Always check the weather forecast before you start.
How often should I re-stain my log cabin?
You should re-stain your log cabin every 3 to 5 years, but this can vary based on several factors:
- Climate: Homes in areas with harsh winters or hot summers may need more frequent maintenance.
- Exposure: South and West-facing walls, which get more sun, may need re-staining every 2 to 3 years.
- Stain Type: Oil-based stains generally last longer than water-based stains.
Regular inspections can help you determine when it’s time for a new coat. Look for signs of fading, cracking, or peeling.
How much stain do I need for a log cabin?
The amount of stain you’ll need depends on the size of your cabin. On average, you will need 10 to 15 gallons to cover a typical log cabin.
For an accurate estimate, consult with your supplier. They can help you calculate the exact amount based on your cabin’s dimensions and the type of stain you choose.
By keeping these factors in mind, you can ensure your log cabin remains beautiful and protected for years to come.
Next, let’s explore the benefits of professional staining services and why Roe Painting is your best choice for the job.
Conclusion
Choosing to stain your log cabin is a great decision for both its beauty and longevity. But why should you trust Roe Painting with this important task?
Roe Painting has years of experience in log cabin restoration. Our professional services are tailored to meet the unique needs of each log home. We know how to bring out the natural beauty of the wood while ensuring it stands up to the elements.
Why Choose Roe Painting?
-
Quality Commitment: We use only the best products, like Sashco log stains, which are designed to preserve your cabin’s natural beauty while providing long-lasting protection. Our team stays updated on the latest techniques to give you the best results.
-
Expertise: With our specialized knowledge in log cabin staining, we ensure that every step is done right—from cleaning and preparation to the final coat. This means fewer problems down the road and a finish that lasts.
-
Comprehensive Services: We don’t just stain. We offer a full range of services, including pressure washing, chinking, and caulking. This ensures that your log cabin gets the complete care it needs.
-
Customer Satisfaction: We stand behind our work. Our goal is to make sure you are 100% satisfied with the results. We even provide a maintenance sheet to help you keep your cabin looking great for years.
Our Connection with Boise State Athletics
As proud supporters of Boise State Athletics, we bring the same level of dedication and teamwork to our work as the athletes do to their sport. We believe in giving our best effort in everything we do, ensuring that your log cabin looks its best.
For more information about our log home services, visit our Log Cabin Refinishing page.
Ready to give your log cabin the care it deserves? Contact Roe Painting today for a free quote and let us help you preserve the beauty and history of your log home.
As our founder and CEO, Andy has passed on a legacy of high-quality craftsmanship from his father before him, who was both a firefighter and painter. Since 2000, Andy has grown RoePaint.com to become an industry leader across Idaho and northern Nevada.